Category Archives: toddlers

Avocado Pesto with Alphabet Macaroni

Standard

000

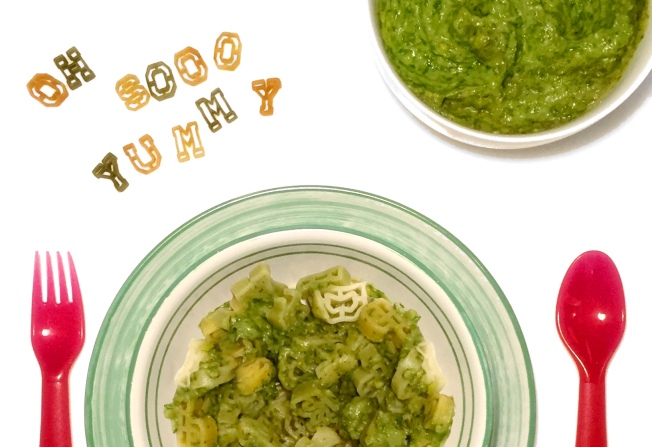
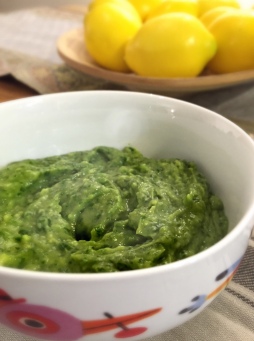
Avocado Pesto.. its one of those things that once you have tried it, you might not want to make traditional pesto again =D

This recipe has been a hit with my little girl for as long as I can remember and the only thing that has changed in the last 4 years, is the size/ shape of the pasta that has evolved with her changing preferences.

The recipe is simple, easy and best of all, you can whip up a large batch when you find great avocados and basil and simply freeze it into portions to use later. I have frozen this pesto for up to a month and although the top layer does darken just a wee bit, it was just as creamy and delicious as the day I first made it. It really is a great way to incorporate avocados into your baby/ child’s diet.

The recipe in the featured photographs is dairy-free & nut-free. I occasionally add toasted pecans or pine nuts and some grated parmesan cheese if I have those handy.
00Nutrition note: Avocado is a hi-fiber superfood rich in Vitamin B &K, Potassium, Folate and Copper. It is a great source of mono unsaturated (good) fats and is great for good hair and skin health.


Ingredients:

  • 2 cups fresh Italian basil leaves
  • 2 medium avocados
  • 1 or 2 cloves garlic, peeled
  • 6-7 tbsp extra virgin olive oil
  • Sea salt & cracked black pepper, as per taste
  • 1/2 lemon


Optional additions: 1/4c. of toasted chopped pecans OR 1/4c. of toasted pine-nuts + 1/4c. grated Parmesan cheese. You will need a little more olive oil to thin out the pesto if you add the nuts and cheese.


To make:

  1. Wash the basil leaves gently and pat dry with a paper towel. Slice the avocado in half and remove and discard the seed.
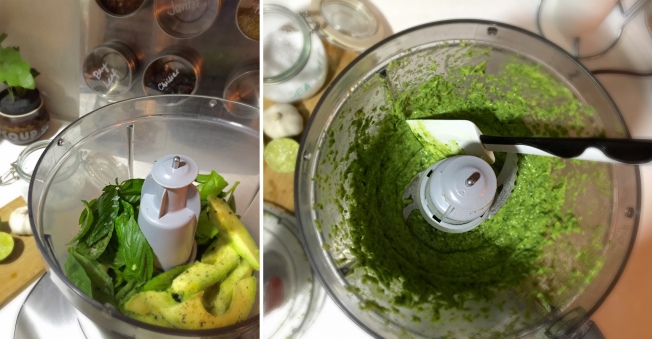
  2. Transfer the basil leaves into the jar of your food processor. Scoop out the avocado flesh into the food processor and add the peeled garlic
  3. Lock the lid in place and ‘pulse’ 4 or 5 times till the basil is chopped up into small pieces. Scrape down the sides of the food processor.
  4. Add the olive oil, sea salt and cracked pepper and a nice squeeze of lemon juice and puree the mix till the pesto is creamy and smooth.

Stir a generous dollop of this pesto through your child’s favourite type of pasta and top with grated Parmesan cheese! So good!!

Tip:  Dress up this simple dish using cherry tomatoes,sauteed mushrooms or steamed corn kernels … Or …diced grilled chicken … Or …K’s favourite…bite sized chunks of poached salmon to make this into one delicious, healthy, power-packed meal for the kids and grown ups alike!
0

Ragi (millet) & Banana Kulfi Pops

Standard

RAgi kulfi

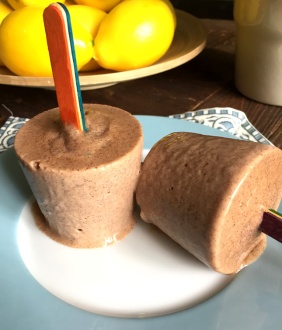
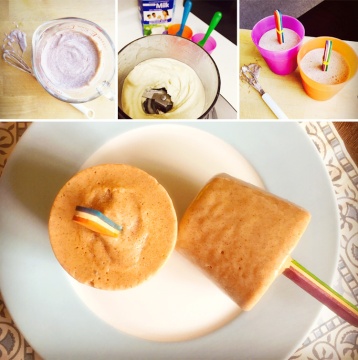
Making popsicles is amazing fun for pre-schoolers. Keya loves helping me make these on the weekends! This Ragi (finger millet) and frozen banana kulfi pop is not only super healthy but also SO delicious! I like to use frozen bananas as they give the kulfi a smooth and creamy texture.

3 ingredients blitzed together and frozen. Easy peasy! This recipe makes 2-4 kulfi’s depending on the size of your molds.

Make these as kulfi-pops or freeze in a freezer-safe box to scoop and serve for younger kids who might struggle with holding the popsicle.

Ragi (finger millet) is a rich source of calcium, protein and iron. It is also a good source of fiber.

Bananas are a very good source of vitamin B6 and a good source of manganese, vitamin C, potassium, dietary fiber, potassium, biotin, and copper.

2RAgi kulfi

Ingredients: 

  • 2 medium bananas
  • 3/4 cup full-fat milk
  • 2 tbsp Ragi flour

To make:

  1. Peel and slice the bananas. Place in a ziplock bag and remove as much air as possible. Freeze for 3-4 hours or overnight.
  2. Measure 2 tablespoons of Ragi flour in a bowl. Set aside. Heat the milk in a saucepan until just steaming. Slowly pour some of the hot milk into the ragi flour and stir to forn a thick smooth paste.
  3. Pour the paste back into the remaining milk in the saucepan and cook the ragi till it forms a thick cake-batter-like consistency. Turn off the heat and allow the ragi-milk mixture to cool completely.
  4. Place the frozen bananas in a blender and blitz in short bursts at first. Then turn up the speed on your blender to puree them until nice and smooth . Add the cooled ragi-milk mixture and blitz till everything is well combined.
  5. Pour into popsicle molds and freeze for 4-5 hours.


If using wooden popsicle sticks, I like to stack them up in 3’s and secure with a little rubberband till the kulfi is completely frozen. I have found that little hands find these thicker sticks easier to grip.

To unmold, dip your plastic or metal popsicle mold in a pan of warm water for 10-15 seconds. Wiggle the stick around gently to loosen and the kulfi pops right out!

Enjoy!


Avocado & Caramel Breakfast Smoothie

Standard

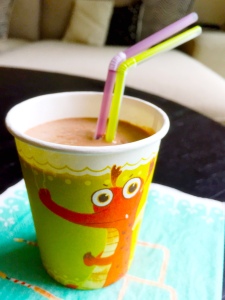
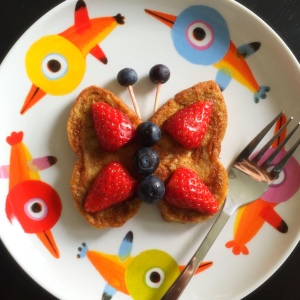
FullSizeRenderThis creamy breakfast smoothie is a regular in our household and one that you really must try out the next time you buy avocados. Not only is it super healthy and downright delicious, but I had Keya asking me for ‘some more please’ when she was done. Doesn’t it just warm your heart when your child genuinely appreciates what you cooked for them? It is such an easy recipe to whip up on a busy weekday morning and a great way to feed avocado to a child who might otherwise resist eating plain avocado. I added a small pinch of cocoa powder for a richer brown colour. Feel free to leave this out if you want 🙂
Nutrition report: Avocado is a hi-fiber superfood rich in Vitamin B &K, Potassium, Folate and Copper. It is a great source of mono unsaturated (good) fats and is great for good hair and skin health. Full fat cow’s milk is rich in calcium, protein and vitamins.

Ingredients:

  • 1 ripe avocado
  • 1-1/2 cups of cold full fat cows milk
  • 2 tbsp Honey + 1 tbsp brown sugar / OR / 2 tbsp of store-bought caramel syrup
  • 1 tsp cocoa powder, sifted (optional)

To make:

  1. Peel, de-seed and scoop the flesh of one ripe avocado into your blender. Add a few spoons of milk and puree till super smooth.
  2. Add the remaining milk , honey and brown sugar and sifted cocoa powder (if using) and blend till nicely combined.
  3. Pour into your childs favourite glass and serve cold 🙂

Enjoy!


Keya’s favourite Butterfly French Toast

Standard

IMG_4586Hmm. It has been a rather long time since my last post. But boring you guys with the sad story of how every blogger faces writers block (sometimes for days weeks ok fine, months!) is not going to be fun, so I am going to dive straight to this super-easy-super tasty breakfast recipe for toddlers, pre-schoolers and pretty much anyone who likes to have some fun with their breakfast 🙂
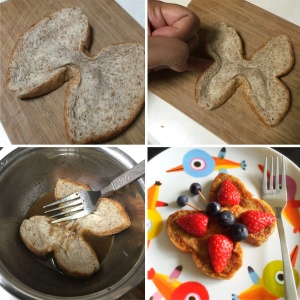
The first time I shared photos of this recipe with friends, they all asked me where I got my uber cute butterfly mold/ cutter from… A ha! There is no mold. It is a slice of regular whole wheat bread that I simply shaped with my fingers 🙂 This is hands down Keya’s latest favourite-est weekend breakfast. It is bread dunked in a delicious egg-cinnamon mixture and fried in a small knob of melted butter. I highly recommend adding the orange zest as it tastes SOOO good! Decorate your cooked french toast with some berries and Voila! you have a healthy, gorgeous looking breakfast!

Nutrition report: Whole wheat bread is an excellent source of fiber and carbohydrates. Eggs are one of the few foods considered to be a complete protein, because they contain all 9 essential amino acids. They are also rich in Iron and Vitamins A,D & E. Cinnamon is rich in magnesium, phosphorus, calcium, and potassium and helps fight common colds and coughs.


Untitled-1 copyIngredients:

  • 1 large egg
  • 1/2 tsp ground cinnamon
  • 1-1/2 tsp brown or white sugar
  • Salt, one small pinch
  • Finely grated orange zest (optional)
  • 2-3 slices whole wheat bread
  • Small knob butter (salted or unsalted)
  • Strawberries, blueberries to decorate
  • 2-3 toothpicks, cut in half
  • Honey to drizzle over if needed


To make:

  1. Whisk the egg in a bowl. Add the cinnamon, sugar, salt and orange zest together in a bowl and whisk until well combined and the mix is smooth and lump-free.
  2. Place a slice of bread on your work surface and pinch the sides as shown in the photo above to create the butterfly shape.
  3. Heat a non-stick fry pan and add a small knob of butter and swirl it around to melt it. Dunk the bread into the egg mixture and press down allowing it to soak in a bit of the egg mix. Turn it over to soak the second side.
  4. Working quickly, transfer the bread into the frying pan carefully- try not to splash! Fry the first side and flip it over to cook second side. Repeat with remaining slices.
  5. While the bread cooks, prepare the strawberries by removing stems and slicing in half.
  6. Transfer the cooked bread to a plate and decorate the wings with strawberries. Use blueberries to make the body. Stick toothpick halves into 2 of the blueberries to make the antennae.

Drizzle over a little bit of honey if desired and serve immediately 🙂 Keya likes this best alongside a glass of freshly squeezed orange juice 🙂


Veggie Fried Rice & Sticky Salmon

Standard

photo 2 (1)Introducing fish and prawns to Keya was a very exciting phase for us. I started her on simple poached & flaked fish (snapper or salmon) or small dices of prawn meat by adding it into her favourite pasta dishes at first as the pasta sauce would help soften up them up. Another hugely successful recipe was homemade fish fingers – yoghurt marinated white fish like snapper, crusted in crushed cornflakes and dried herbs and then shallow fried in some olive oil till golden brown and cooked … Just realised, I haven’t posted that recipe yet! Whoops!

Although we mostly cook all of our meals at home, my husband and I  occasionally crave some good ol’ fried rice and grilled fish from our neighbourhood hawker centre. Keya (18 mons old at the time) who we have kept away from restaurant and especially hawker food, insisted on trying some and looked mighty thrilled when she had her first taste of fried rice. But of course it inspired me to make a much healthier version of that dish for her!

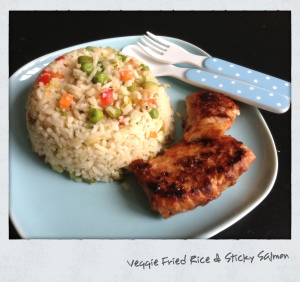
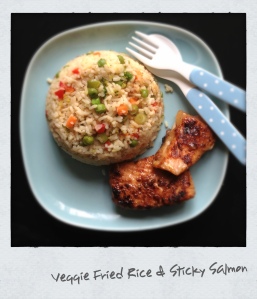
This recipe is an adapted version of one by Anabel Karmel , and is hands down Keya’s favourite-EST meal in the whole wide world. Fresh veggies sauteed with rice and seasoning and soya-honey marinated grilled salmon… what’s not to like, right?

I generally use white Basmati rice for this recipe but please feel free to use brown rice if your prefer. This is a guaranteed hit that the whole family aged 18mons and up will enjoy! 🙂

Nutrition report:  Salmon is an excellent source of high-quality protein, vitamins and minerals (including potassium, selenium and vitamin B12). Salmon is also rich in omega-3 fatty acids which contribute to healthy brain and heart function, healthy joints and general wellbeing. White rice is rich in carbohydrates and contains some protein. Brown rice has a better protein and fat content and is comparitively lower in carbohydrates. It contains about 4 times the amount of fiber than in white rice. The mixed vegetables ofcourse pack in more vitamins and minerals and BOOOST not just the flavour but also the confetti like appeal.

Ingredients for Fried Rice: (Makes 2 servings for a toddler)

– 1 or 2 tsp sesame or olive oil

– 1/2 tsp. ginger, very finely chopped

– 2 spring onions or 1/2 white onion, very finely chopped

– 3/4 cup diced mixed veggies (carrot, broccoli, french beans, boiled sweetcorn kernels, green peas, red capsicum)

– 1 or 2 tsp fried rice seasoning (i use SHAN’s egg fried rice seasoning)

– 1/2 cup raw white/ brown rice (pre-cooked till tender and then cooled and fluffed with a fork)

– a small handful of chopped fresh coriander (optional)

– cracked black pepper and salt optional as the seasoning contains both

Ingredients for Sticky Salmon: (Makes 2 servings for a toddler)

– 1 boneless, skinless salmon fillet (about 250-300g), cut into 2 inch cubes

– 1 tbsp olive oil

– 4-5 tbsp low sodium soy sauce

– 2-3 tbsp honey ( plus optional 1/2 tsp brown sugar)

– 1 tsp garlic powder + 1/2 tsp cracked black pepper

Method for Fried Rice:

1. Cook the white or brown rice in boiling water till almost cooked. Drain any extra cooking water and fluff the rice with a fork and allow it to fully cool ( I also chill the rice for abt 30 mins when time permits) Prep the rice in advance so you are not tempted to use freshly cooked rice else you will end up with sticky rice instead of fried rice 😉

2. Heat the sesame or olive oil in a non-stick pan on medium-high heat. Saute the finely chopped ginger for half a minute before adding the chopped spring onions. Saute till they’re soft.

3. Add the small dices of mixed veggies – add the carrot, broccoli and beans first. Cooked corn, red capsicum and peas a bit later. Saute all the veggies till they’re soft enough for your child to eat.

4. Add the seasoning powder to the sauteed veggies and lower the heat. Add the cooked (and cooled and fluffed) rice. Mix everything together nicely. Stir through the chopped coriander. Check for seasoning by tasting and adjust (add) seasoning powder per preference or add a small splash of soy sauce.

Turn off the heat. Keep covered till its time to eat!

photo 1 (1)Method for Sticky Salmon:

1. Place the boneless, skinless salmon cubes in a bowl. Drizzle over the olive oil, low sodium soy sauce, honey, brown sugar, garlic powder. Season with some black pepper. Taste-test the marinade and adjust the ingredients to your liking. Cover and marinate the salmon for about 30 mins.

2. Heat a non-stick pan on medium-high heat. Add the salmon cubes one by one to the hot pan. (no need to add any oil)

3. Cook the salmon on all sides till nice and brown and cooked through. Drizzle a spoonful of the marinade as the salmon cooks.

Serve this yummy, salty-sweet-sticky salmon to your kids along side the fried rice and happily watch them gobble it up!

Quinoa Cutlets

Standard

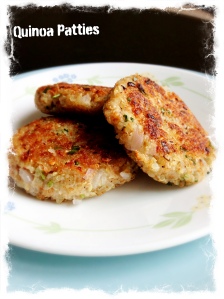
photo 2I admit it… I’ve been a wee bit obsessed with Quinoa in the past couple of weeks. I’ve always loved recipes featuring this super seed but Keya’s not quite ready to try those yet as most are salads.  As she has finally started to react positively to her Quinoa “khichdi”  (an indian preparation involving cooking lentils and rice with vegetables and mild spices like tumeric and garlic) I made it my mission to create more recipes with simple handy ingredients.

Marie, my helper, miscalculated the quantity and accidentally cooked an enormous batch of Quinoa for a salad I wanted to make a few weeks ago.  This recipe was a result of wanting to use up leftover plain- cooked quinoa, but has turned out to be such a big hit with Keya, that its becoming a regular item on our weekly meal plan 🙂

Nutrition report:  Quinoa is packed with fiber, calcium, iron and folate and is a fantastic source of vegetarian protein.  Shredded veggies pack in loads of flavor and vitamins.


photo 1 (1)Ingredients:

– 1 cup cooked Quinoa

– 1 small onion, very finely chopped

– 1/4 cup finely grated carrot + finely grated broccoli

– 1 small handful, coriander, finely chopped

– 1 clove garlic, grated

– Salt & Pepper, to taste

– 3-4 tbsp dried breadcrumbs (optional)


Method: 

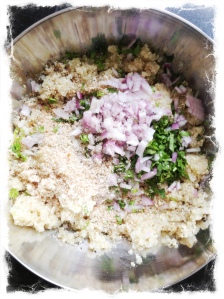
1. In a large mixing bowl, place cooked, drained quinoa along with remaining ingredients. Mix well while mashing everything together using lightly oiled hands.

2. Heat a tablespoon of olive or vegetable oil in a non-stick pan. Scoop a small handful of the mixture into your hands and shape into a ball and flatten into a cutlet.

3. Gently place the cutlets into the pan and cook till golden brown. Flip and cook on the second side.

4. Place the cooked cutlets on a paper towel/ napkin to remove any extra oil. Cool the cutlets and cut up into age appropriate bite sized portions and serve with or without some ketchup on the side 🙂


These cutlets are rather delicate and very soft. The crust formed on the outside is easily chewable even for a toddler with fewer teeth.  Happy eating!

Quinoa Pancakes with Orange zest

Standard

photo 1As a working mum Monday to Friday is about following a schedule for Keya like clockwork. It’s the only way to not let the endless list of chores, errands and to-do-list for work related commitments overwhelm me. But  this also means a standard breakfast menu for Keya through the week. Eggs & orange juice, Fruit with yoghurt and Oats are the items Keya’s nanny is comfortable putting together for her through the week while I am away at the office. Weekends are the only real time where I can indulge Keya in one of her favourite breakfasts – Pancakes, that I usually make using home-made Oat flour. I was keen to experiment with Quinoa but finely ground Quinoa is a bit tricky to achieve using a food processor*.  So when I found organic Quinoa flour at Mustafa centre, I resolved to experiment with this wonderful ingredient.

I mixed Quinoa flour with the remaining standard pancake ingredients – eggs, milk, vanilla and baking powder to make a smooth batter. The batter tasted rather nutty and for a minute I was unsure if K would like it. So I added a teaspoon of brown sugar (use white if that is what you have at hand) and some orange zest, from the peels of the Orange I had juiced for her to drink with breakfast. The flavour combination was fantastic, and sure enough a big hit with my little foodie 🙂

*Indian dry grinders or  spice grinders will yeild better results for grinding hard seeds like Quinoa at home… and yes, Quinoa is infact a seed, not a grain… Something I myself learnt recently too!

Nutrition report:  Quinoa is packed with fiber, calcium, iron and folate and is a fantastic source of vegetarian protein. Eggs in the pancake are a great source of protein, calcium and iron.


photo 4Dry Ingredients:

– 1 cup Quinoa flour

– 1 tsp each : baking powder, ground cinnamon and brown/ white sugar

– 1 tsp fresh orange zest (from 1 orange)

Wet ingredients:

– 1 egg, whisked

– 1/2 to 3/4 cup milk

– 1 tsp vanilla extract  +  1 large tbsp Olive oil

Toppings:

– Butter and Honey or Maple Syrup


To make:

1. In a large mixing bowl, whisk all the dry ingredients together. Set aside.

2. In a separate bowl, whisk together all the wet ingredients.

3. Gently pour the wet mix into the dry and stir to make a smooth batter. If you find the batter a bit sticky add a little splash of milk to get it smooth.

4. Heat a non-stick pan on medium-low heat. Pour a small amount of batter on the pan. The batter spreads itself a little bit and then sets into a round. Wait for little holes to form on the top side and then flip the pancake to cook on 2nd side.

5. Stack up the cooked pancakes on a plate. Top with a knob of butter and drizzle on honey or maple syrup.  Serve along side some freshly squeezed Orange juice and then sit back and happily watch it all disappear into a greedy little baby’s belly 😀


photo 3


Pumpkin & Cheese Couscous

Standard

ImageCouscous, a coarsely ground form of quick cooking pasta made from semolina is a common ingredient used in middle eastern and African cooking. Although it doesn’t have too much flavour on it’s own couscous is pretty yum when combined with a good sauce. Keya took a little while to like the granular texture. Initial episodes of suspiciously eyeing the new texture (when she was about 9 mos) did happen. But I persisted and she finally loves it! Hurrah! Nutritionally – couscous is akin to pasta. It is quick to cook and saves you a LOT of time on crazy days. Also, babies who are just getting teeth, learn to appreciate the granular easy-to-gum texture.

(Although couscous itself cooks in 5 mins, the sauce needs a little time. But I optimize my time by making 3-4 servings at a time and freezing the extra in ice-cube trays. Freezing is so convenient but in general I avoid giving Keya anything that was frozen for more than 2 weeks… thats my personal quirk so I usually use up my frozen baby food within 10 days.)

Keya loves the pumpkin-cheese sauce that I make for her. Its basically a thick version of pumpkin soup with lots of added cheese. I begin by baking the pumpkin because that’s my favourite way of cooking it as you can extract max flavour without losing any nutrients in cooking water as you would by boiling – But feel free to steam it in a veggie steamer  if you own one and/ or are pressed for time.

Nutrition report: This meal is a good source of fiber(from couscous), is rich in vitamins A, B, C, E and beta- carotene. The cheese packs in a lot of flavour and is an excellent source of protein.

ImageIngredients:

– 1-1/2 cups peeled pumpkin cubes

– 4 cloves garlic with peel (if roasting)

OR  1 peeled clove if sauteing in pan

– 1 small onion, sliced thinly

– 5-6 tbsp grated Parmesan cheese

– 1 tsp dried oregano or basil (optional)

– 2 tsp Olive oil

– Salt & Pepper to taste

Method:

1.  Preheat oven to 200 deg C. Line a baking tray with aluminum foil. Toss the pumpkin and unpeeled garlic cloves in a teaspoon of olive oil. Season with salt and pepper. Transfer the pumpkin and garlic onto the baking tray and bake @ 200deg C for 30mins. Cool.

2. Heat the remaining oil in a non-stick pan. Add the sliced onion and saute till soft and slightly golden brown. If you’re steaming the pumpkin instead of baking it with the garlic – add 1 clove of peeled sliced to the pan along with the onion. Allow the contents of the pan to cool.

3.  Place the cooled roasted (or steamed) pumpkin cubes in a blender or food processor along with the roasted(or sauteed) garlic and sauteed onions. Add a little water (about 1/4 cup) and puree everything till nice and smooth.

4.  Return the pureed mixture to the previously used non-stick pan. Add the dried herbs at this point and bring the mix up to a gentle simmer. Stir in the grated Parmesan cheese.

5.  To cook couscous – place 2-3 tbsp of couscous in a bowl (to make a single serving). Pour 1/3rd cup of very hot water (2 times the qty. of couscous) over the couscous and cover with a lid. Set aside for 5 mins allowing the couscous to soften. Uncover and fluff it up using a fork.

6. Serve the couscous mixed with the pumpkin sauce to make a hearty- healthy meal. Sprinkle some extra grated Parmesan on top if you please 🙂

Yummy yum yum!!

11 (3)

Whole grain veggie + cheese crackers

Standard

IMG_4572As parents who love to be out and about with their baby,  Vineet and I have our challenges when it came to sticking to otherwise religious mealtimes for Keya. Grocery stores are stocked with so many brands of snacking options for infants and toddlers. Teething rusks, teething cookies, biscuits, all swearing they are healthier than the next. Sure they’re easy options – but all are sweet!  Keya, I have come to realize, doesn’t seem to have much of a sweet tooth – not something I am complaining about as this will hopefully save us a lot of $$$ on dental care later on – but finding suitable snack options for her is challenging.  Add that to my slightly obsessive habit of trying to make everything healthier and you have — these awesome whole grain vegetable crackers! A tasty savory snack for babies and toddlers. These have become a huge hit with K and my go-to snack option for her when we’re out or traveling.

Nutrition report: Complex Carbohydrates, Vitamins, Protein.

IMG_4571

Ingredients:

– 1cup whole wheat flour

– 1/2c. finely ground rolled oats

-1/2c grated cheddar cheese

– 1/4c. sunflower and/or pumpkin seeds, coarsely ground

– 4-5tbsp finely grated carrot

–  3-4 tbsp grated broccoli florets

– 1/2 c room temp unsalted butter

– 1/4tsp baking powder
– 3/4c. cold water
– 1/2 tsp each of Salt, pepper, oregano flakes (adjust salt to preference)
To make:
1. Sift the whole wheat flour into a mixing bowl. Add the finely ground raw oats, ground sunflower and baking powder, salt, pepper and oregano. Whisk well to combine.
2. Add the butter into the mixing bowl and rub into the dry ingredients till the mixture resembles bread crumbs. Add the grated cheese, carrot and broccoli and mix well.
3. Knead the mixture into a dough using the cold water. The dough should not be too soft – neither should it feel dry and hard. Divide the dough into 2 equal sized portions. Shape it into a thick disc and wrap each in plastic wrap and chill for 15-20 mins in the fridge.
4. Preheat your oven to 200 deg C.  Line a baking tray with non-stick baking paper.
5a. Unwrap one of the dough discs. Roll on to a generously floured surface till its abt 1/4″thick. Using a cookie cutter, cut out shapes. Place the shapes on the baking tray. To help the crackers brown nicely, you may brush the tops with a lightly beaten egg. Bake @ 200 deg C for 30 mins. The centre of the crackers might be a little bit soft, but these will harden up on cooling. Allow the crackers to cool completely.
5b. For the second disc of dough – I employed a different technique and made these spirals or twists by gently twirling the dough. To make these – Roll out the second chilled dough disk on  a floured surface till 1/4″thick. Using a pizza cutter or knife, cut into 1/2″ wide x 3″long strips. Hold one end of the strip with one hand. Gently twist the strip 2 or 3 times and press down the second end gently. Repeat with all remaining strips. Arrange strips on a baking tray lined with non-stick paper. Brush lightly with beaten egg (optional step to help browning). Bake @ 200 deg C for 45mins.
Once baked, allow the twists to cool completely.If you would like to avoid the egg, increase the baking time by another 10 mins to help brown the crackers. Store the cooled crackers in an air-tight container.
Babies and toddlers who are teething can enjoy these healthy savoury crackers during travel or at home. Offer these to a grown up child with some cream cheese on the side for dipping 😉

Baby’s Vanilla- Egg Custard

Standard

photo 1A few mommy-pals of mine have been asking me for ways to offer eggs to their babies. Much like them, I have faced a situation where K got really bored of mashed boiled egg (yolk only till she turns 1), and scrambled egg. I have started to add these to her cerelac of late, when I am pressed for time as plain ol’ cerelac just doesn’t seem like enough nutrition for my active little monkey.

Home-made custard is another novel way of offering your baby eggs. Commercial custard powder is mostly cornstarch, so I prefer to steer clear of it… and with how easy this custard is to make – it hardly counts as effort… even for the sleepiest mommy on a sunday morning (like me!) Keya just laps this up when I serve it mixed with grated strawberries and blueberries 🙂

Nutrition report: Rich in Iron, Calcium, and Protein and Multi-vitamins from the added fruit.

Ingredients:

– 1 cup cow’s milk

– 1 egg yolk

– 2 tsp cornflour

– 1.5 tsp Sugar

– 1 tsp Vanilla extract ( 1.5 tsp if you want to camouflage the egg-iness further)

photo 2To make:

1.  In a saucepan, bring the milk and sugar up to a gentle simmer.

2.  While the milk heats, whisk the egg yolk and cornflour together in a bowl. Pour a little milk (1/4 cup) of the warm milk into the egg mixture and whisk till smooth.

3.  Pour the egg-cornflour-milk mixture back into the rest of the milk in the saucepan. Add the vanilla. Bring the custard up to a full boil while whisking continuously to avoid lumps. Keep stirring till the custard thickens (it will further thicken as it cools).

4.  Pour the custard into a jug/ bowl. Use a mesh sieve if you have any accidental lumps.

Cover it with plastic wrap – such that the plastic wrap touches the surface of the custard. This prevents the custard from forming a ‘skin’ on top as it cools. Chill the custard in the fridge till its time to serve.

This is delicious served with fresh fruit like – berries, bananas, apples, peeled oranges and also grapes!  Feel free to make this more “apple-y” by mixing some applesauce into the custard before you add fruit pieces. 

Enjoy!  🙂