Category Archives: 12mos+

Avocado Pesto with Alphabet Macaroni

Standard

000

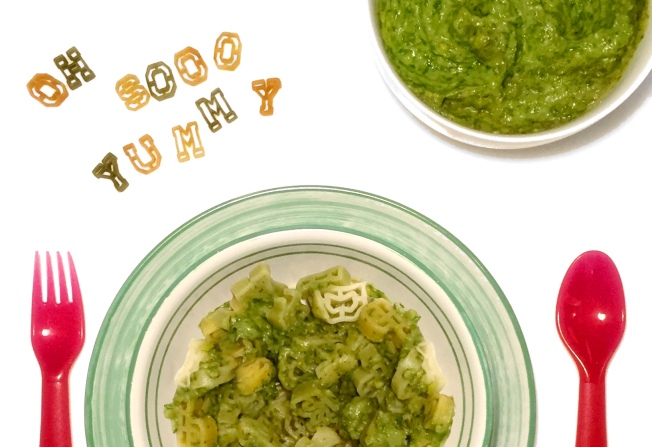
Avocado Pesto.. its one of those things that once you have tried it, you might not want to make traditional pesto again =D

This recipe has been a hit with my little girl for as long as I can remember and the only thing that has changed in the last 4 years, is the size/ shape of the pasta that has evolved with her changing preferences.

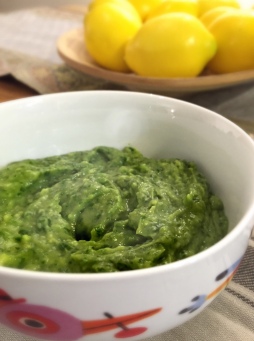
The recipe is simple, easy and best of all, you can whip up a large batch when you find great avocados and basil and simply freeze it into portions to use later. I have frozen this pesto for up to a month and although the top layer does darken just a wee bit, it was just as creamy and delicious as the day I first made it. It really is a great way to incorporate avocados into your baby/ child’s diet.

The recipe in the featured photographs is dairy-free & nut-free. I occasionally add toasted pecans or pine nuts and some grated parmesan cheese if I have those handy.

00Nutrition note: Avocado is a hi-fiber superfood rich in Vitamin B &K, Potassium, Folate and Copper. It is a great source of mono unsaturated (good) fats and is great for good hair and skin health.


Ingredients:

  • 2 cups fresh Italian basil leaves
  • 2 medium avocados
  • 1 or 2 cloves garlic, peeled
  • 6-7 tbsp extra virgin olive oil
  • Sea salt & cracked black pepper, as per taste
  • 1/2 lemon


Optional additions: 1/4c. of toasted chopped pecans OR 1/4c. of toasted pine-nuts + 1/4c. grated Parmesan cheese. You will need a little more olive oil to thin out the pesto if you add the nuts and cheese.


To make:

  1. Wash the basil leaves gently and pat dry with a paper towel. Slice the avocado in half and remove and discard the seed.
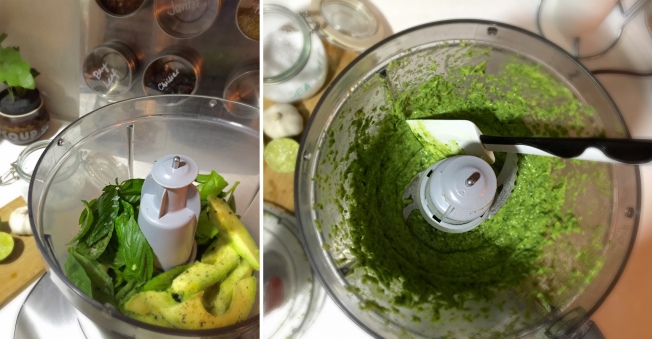
  2. Transfer the basil leaves into the jar of your food processor. Scoop out the avocado flesh into the food processor and add the peeled garlic
  3. Lock the lid in place and ‘pulse’ 4 or 5 times till the basil is chopped up into small pieces. Scrape down the sides of the food processor.
  4. Add the olive oil, sea salt and cracked pepper and a nice squeeze of lemon juice and puree the mix till the pesto is creamy and smooth.

Stir a generous dollop of this pesto through your child’s favourite type of pasta and top with grated Parmesan cheese! So good!!

Tip:  Dress up this simple dish using cherry tomatoes,sauteed mushrooms or steamed corn kernels … Or …diced grilled chicken … Or …K’s favourite…bite sized chunks of poached salmon to make this into one delicious, healthy, power-packed meal for the kids and grown ups alike!

0

Ragi(millet), Almond & Cranberry Biscuits

Standard

FullSizeRender.jpgThe past week has been exhausting with the house move, K on a week-long break from school and of course endless list of errands that piles up from a combination of these two. As we finally have our wi-fi up and running and Keya is back at school, here I am dutifully posting the recipe I promised for these amaaaazing biscuits.

Packed with healthy ingredients, mildly sweet, these biscuits keep so well even in this god awful humid weather! Best paired with a glass of warm or chilled milk for the little ones for a quick after-school snack or a perfect to add to lunch-boxes. (Seriously, you will never want to dunk an oreo in a glass of milk again!)

Being equally popular with the kiddos and grown-ups (they’re so good paired with a piping hot cup of chai!) I usually end up doubling the recipe each time I make these 🙂

Nutrition note: Ragi (finger millet) is a rich source of calcium, protein and iron. It is also a good source of fiber.

Almonds are rich in fiber, Vitamin E, Protein, and Minerals (manganese, potassium, calcium, iron, magnesium, zinc, and selenium), and have considerable amounts of essential fatty acids. They are also rich in beta carotene, which is a powerful antioxidant that helps boost immunity.

Ingredients:

Dry mix :

  • 3/4c. Ragi (finger millet) flour
  • 1/2c. ground almonds
  • 1/2 tsp baking soda
  • 1/4c. dried cranberries (or mini-chocolate chips or chopped candied ginger)
  • a pinch of salt

Wet mix:

  • 1/2c. unsalted butter (soft)
  • 3-4 tbsp runny honey
  • 2 tbsp. brown sugar

To decorate:

  • 1/4 cup of almond flakes

untitled-1

To make:

  1. Measure and mix all the dry ingredients into a large mixing bowl. Break up any clumps of dried cranberries (they tend to stick) to ensure an even distribution throughout the dough.
  2. Melt the butter in a saucepan over gentle heat. Add the honey and brown sugar and whisk gently until the sugar is completely dissolved and the mixture looks silky smooth.
  3. Pour the melted butter-honey-sugar mix into the bowl of dry ingredients. Work quickly and stir everything together till it form a soft but crumbly dough (this happens as ragi / finger millet is gluten-free).
  4. Cover and chill the dough in the refrigerator for about 20 min. This makes it a bit easier to handle.
  5. Pre-heat your oven to 180 deg C. Line your baking tray with baking paper.While the oven heats up, scoop small balls of dough using a teaspoon onto your palms and roll them till smooth, tucking away any cheeky pieces of cranberries that try to escape.
  6. Place the rolled dough balls onto the baking sheet and flatten using gentle pressure from your finger tips. Dot each biscuit with a pretty almond flake.
  7. Bake at 180 deg C for about 15-17 min. Allow the biscuits to cool for a few minutes before transferring carefully onto a wire rack. The biscuits are a bit fragile at this point (but firm up as they cool completely), so be gentle!


These keep well stored in an air-tight container for about 8-10 days – IF they last that long 🙂

fullsizerender_1

Ragi (millet) & Banana Kulfi Pops

Standard

RAgi kulfi

Making popsicles is amazing fun for pre-schoolers. Keya loves helping me make these on the weekends! This Ragi (finger millet) and frozen banana kulfi pop is not only super healthy but also SO delicious! I like to use frozen bananas as they give the kulfi a smooth and creamy texture.

3 ingredients blitzed together and frozen. Easy peasy! This recipe makes 2-4 kulfi’s depending on the size of your molds.

Make these as kulfi-pops or freeze in a freezer-safe box to scoop and serve for younger kids who might struggle with holding the popsicle.

Ragi (finger millet) is a rich source of calcium, protein and iron. It is also a good source of fiber.

Bananas are a very good source of vitamin B6 and a good source of manganese, vitamin C, potassium, dietary fiber, potassium, biotin, and copper.

2RAgi kulfi

Ingredients: 

  • 2 medium bananas
  • 3/4 cup full-fat milk
  • 2 tbsp Ragi flour

To make:

  1. Peel and slice the bananas. Place in a ziplock bag and remove as much air as possible. Freeze for 3-4 hours or overnight.
  2. Measure 2 tablespoons of Ragi flour in a bowl. Set aside. Heat the milk in a saucepan until just steaming. Slowly pour some of the hot milk into the ragi flour and stir to forn a thick smooth paste.
  3. Pour the paste back into the remaining milk in the saucepan and cook the ragi till it forms a thick cake-batter-like consistency. Turn off the heat and allow the ragi-milk mixture to cool completely.
  4. Place the frozen bananas in a blender and blitz in short bursts at first. Then turn up the speed on your blender to puree them until nice and smooth . Add the cooled ragi-milk mixture and blitz till everything is well combined.
  5. Pour into popsicle molds and freeze for 4-5 hours.


If using wooden popsicle sticks, I like to stack them up in 3’s and secure with a little rubberband till the kulfi is completely frozen. I have found that little hands find these thicker sticks easier to grip.

To unmold, dip your plastic or metal popsicle mold in a pan of warm water for 10-15 seconds. Wiggle the stick around gently to loosen and the kulfi pops right out!

Enjoy!


Avocado & Caramel Breakfast Smoothie

Standard

FullSizeRender
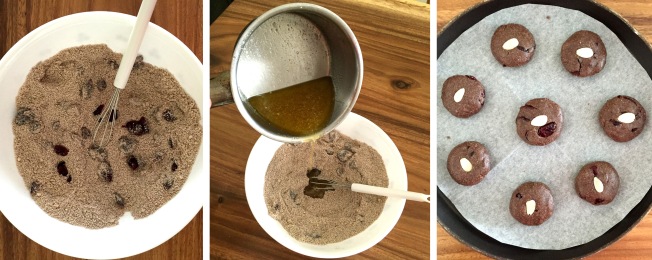
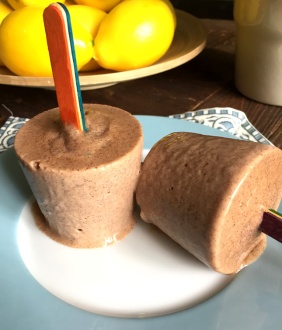
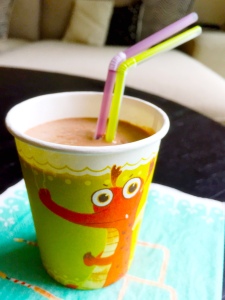
This creamy breakfast smoothie is a regular in our household and one that you really must try out the next time you buy avocados. Not only is it super healthy and downright delicious, but I had Keya asking me for ‘some more please’ when she was done. Doesn’t it just warm your heart when your child genuinely appreciates what you cooked for them? It is such an easy recipe to whip up on a busy weekday morning and a great way to feed avocado to a child who might otherwise resist eating plain avocado. I added a small pinch of cocoa powder for a richer brown colour. Feel free to leave this out if you want 🙂

Nutrition report: Avocado is a hi-fiber superfood rich in Vitamin B &K, Potassium, Folate and Copper. It is a great source of mono unsaturated (good) fats and is great for good hair and skin health. Full fat cow’s milk is rich in calcium, protein and vitamins.

Ingredients:

  • 1 ripe avocado
  • 1-1/2 cups of cold full fat cows milk
  • 2 tbsp Honey + 1 tbsp brown sugar / OR / 2 tbsp of store-bought caramel syrup
  • 1 tsp cocoa powder, sifted (optional)

To make:

  1. Peel, de-seed and scoop the flesh of one ripe avocado into your blender. Add a few spoons of milk and puree till super smooth.
  2. Add the remaining milk , honey and brown sugar and sifted cocoa powder (if using) and blend till nicely combined.
  3. Pour into your childs favourite glass and serve cold 🙂

Enjoy!


Buckwheat, Coconut & Banana Pancakes

Standard

photo 1 (2)Those who have been reading my blog might notice that once I try out a new ingredient for Keya I tend to become a teeny-tiny bit obsessed with coming up with different ways to serve it to her 🙂 First it was Quinoa, now its… (drumroll)… Buckwheat!

I’ve recently become fascinated with vegan & gluten-free recipes because they’re opening up a whole new range of ingredients for me. Not saying buckwheat is a food only vegans and / or gluten-free folks enjoy, but it definitely (based on my reading) features more often than not on their blogs, websites and cookbooks.

Having grown up in India, I am familiar with a wide variety of grains – jowar(sorghum), bajra (pearl millet), ragi (finger millet), oats, dalia (broken wheat) to name a few. Although buckwheat flour, aka kuttu ka atta is used in northern India to make delicious roti’s I somehow heard about it for the first time only after we moved to Singapore. I was surprised to know it existed in Indian cuisine, but then again it is entirely possible to spend your whole life in India and not know about certain ingredients that may be very common in one part of the country but unheard of in the other!

Nevertheless, it is a fantastically healthy, supremely tasty super seed (YES! it isn’t a grain although the name suggests it might be!) and its definitely something I was very excited to introduce to Keya (and her dad & me ofcourse!).

Cooking enthusiasts like your’s truly, have a compulsive need to keep tweaking recipes each time they make them. This morning as I pulled ingredients together for Keya’s usual buckwheat & banana pancakes, I added some coconut flour to the batter… and the result was a super moist, coconutty – banana flavour …SO delicious!! And oh, if you don’t have any coconut flour, no worries! Use coconut milk powder instead!

Nutrition Report: Buckwheat is high in fiber and contains Iron, Niacin, Folate and even Vitamin K. Bananas contain fiber and potassium and are also high in Vitamin B6, Vitamin C and Vitamin B2. Eggs in the recipe ofcourse are rich in protein, iron and Vit. D.

photo 2 (2)Ingredients: (makes 8-9 mini pancakes)

– 3/4 cup buckwheat flour

– 2-3 tbsp coconut flour /or/ coconut milk powder

– 1/2 tsp sugar + a pinch of salt

– 1/2 tsp baking powder

– 1 med. banana, mashed

– 1 egg, beaten

– 1 tbsp olive oil / or / melted unsalted butter

– milk, as required to make the batter (approx. 1/2 to 3/4cup)

optional additions: chopped walnuts / chopped dried coconut flakes / raisins

photo 3Method:

1. Measure out and mix together all the dry ingredients in a bowl (buckwheat flour, coconut flour or powder, sugar, salt & baking powder). If using add the finely chopped nuts / coconut flakes to the bowl and stir to distribute into the dry mix.

2. In a seperate bowl whisk the egg till pale yellow and add the mashed banana and olive oil into it.

3. Make a well in the dry mix and pour the egg-banana-oil mixture to the middle and whisk gently. This will be an extremely sticky mixture. Add the milk in slowly in batches whisking after each addition till a smooth thick batter is achieved.

4. Heat a non-stick pan or skillet. Ladle the batter onto the hot griddle. Allow it to spread our naturally into a little circle (about 3or4″ dia). Lower the heat to medium and cook till the wet top side of the pancake sets and small holes appear. Flip and cook on the second side.

5. Stack up the cooked pancakes on a plate. Drizzle with some honey and dot with a knob of butter. Garnish with some fresh strawberries if you have any and watch your kid(s) squeal (mine did!) and excitedly dig in!  🙂 Happy eating!

Quinoa Pancakes with Orange zest

Standard

photo 1As a working mum Monday to Friday is about following a schedule for Keya like clockwork. It’s the only way to not let the endless list of chores, errands and to-do-list for work related commitments overwhelm me. But  this also means a standard breakfast menu for Keya through the week. Eggs & orange juice, Fruit with yoghurt and Oats are the items Keya’s nanny is comfortable putting together for her through the week while I am away at the office. Weekends are the only real time where I can indulge Keya in one of her favourite breakfasts – Pancakes, that I usually make using home-made Oat flour. I was keen to experiment with Quinoa but finely ground Quinoa is a bit tricky to achieve using a food processor*.  So when I found organic Quinoa flour at Mustafa centre, I resolved to experiment with this wonderful ingredient.

I mixed Quinoa flour with the remaining standard pancake ingredients – eggs, milk, vanilla and baking powder to make a smooth batter. The batter tasted rather nutty and for a minute I was unsure if K would like it. So I added a teaspoon of brown sugar (use white if that is what you have at hand) and some orange zest, from the peels of the Orange I had juiced for her to drink with breakfast. The flavour combination was fantastic, and sure enough a big hit with my little foodie 🙂

*Indian dry grinders or  spice grinders will yeild better results for grinding hard seeds like Quinoa at home… and yes, Quinoa is infact a seed, not a grain… Something I myself learnt recently too!

Nutrition report:  Quinoa is packed with fiber, calcium, iron and folate and is a fantastic source of vegetarian protein. Eggs in the pancake are a great source of protein, calcium and iron.


photo 4Dry Ingredients:

– 1 cup Quinoa flour

– 1 tsp each : baking powder, ground cinnamon and brown/ white sugar

– 1 tsp fresh orange zest (from 1 orange)

Wet ingredients:

– 1 egg, whisked

– 1/2 to 3/4 cup milk

– 1 tsp vanilla extract  +  1 large tbsp Olive oil

Toppings:

– Butter and Honey or Maple Syrup


To make:

1. In a large mixing bowl, whisk all the dry ingredients together. Set aside.

2. In a separate bowl, whisk together all the wet ingredients.

3. Gently pour the wet mix into the dry and stir to make a smooth batter. If you find the batter a bit sticky add a little splash of milk to get it smooth.

4. Heat a non-stick pan on medium-low heat. Pour a small amount of batter on the pan. The batter spreads itself a little bit and then sets into a round. Wait for little holes to form on the top side and then flip the pancake to cook on 2nd side.

5. Stack up the cooked pancakes on a plate. Top with a knob of butter and drizzle on honey or maple syrup.  Serve along side some freshly squeezed Orange juice and then sit back and happily watch it all disappear into a greedy little baby’s belly 😀


photo 3


Avocado & Cheese Omelette

Standard

12 (1)I owe the regular readers of this blog and friends who text/ call me for baby food ideas- the biggest apology. I’ve been telling a number of you about new recipes that I plan to post “this coming weekend” and dint make true of my promise.  Put simply – I went through a phase where the recipe ideas flowed but I had a case of serious writer’s block. But this afternoon, I’ve made a promise to myself — block or no block, recipes I shall post.

Avocado’s are considered as among nature’s most perfect food. It is also on the list of ideal first foods that a lot of nutritionists recommend for babies as they’re high in good fats that help in the healthy development of your baby’s brain and central nervous system.  They’re loaded with vitamins, contain important minerals such as potassium, calcium.

I introduced Keya to avocado’s in mashed form mixed with banana’s or steamed peaches at around 6 months of age. She loved the creamy texture but as she began to teeth, lost interest in it as she preferred food she could gum instead.

Let’s admit – although Avocado’s are packed with great stuff, its hard to tempt a curious toddler with its mild flavoured mash – at least that’s the challenge I have faced in the past few months. I started baking using avocado recently but have been trying to use it in something which was more routine – and then it hit me! The answer had been right before my eyes!

Mashed avocado in scrambled eggs or cheese omelette is AMAZING!  I’ve made 2 versions of this recipe – one, adding the mashed cado’s into the whisked eggs before cooking – for a proper avocado omelette. Another, of topping a cheesy omelette with fresh avocado slices. Both are equally delicious with only real difference being that the incorporated cado omelette has a slight greenish tinge.

Feel free to stir mashed avocado or pre-made thawed avocado puree into scrambled eggs just as they begin to set… I’ve tried that too, but haven’t taken a photo of that yet.  If you’re baby is under the age of 1 and you prefer to avoid the egg whites, just scrambled egg yolks and avocado will work just as well. Add a dollop of cream cheese (if available) and you’re good to go.  For toddlers and older kids I’d even recommend adding a few spoonfuls of avocado puree into your pancake batter…yum!

Nutrition report:  Great source of protein, calcium, multi-vitamins, potassium and iron.

BTW – Something is messed up with the wordpress text formatting … I am aware that some text appears larger than the rest and I have no idea why.. Please bear with me till I have it figured out and fixed.  Thanks!

Ingredients:

– 1 large Egg  (or only egg yolk for babies under 1)

– 1/2 a mashed avocado (Mash remaining avocado with a squirt of lime juice and freeze. For 1 egg yolk use abt 2 tsp of avocado puree)

– 2 tsp of grated cheddar cheese / OR / 1-2 tbsp of cream cheese

– Pinch of cracked black pepper. Salt is optional (as we’re using cheese)

12 (2)Method: (For Avocado Omelette)

1.   Heat a non-stick pan. Drizzle a wee bit of oil and swirl it around a little. 

2.  While the pan heats, whisk the egg with a fork till light and fluffy.  Stir in the mashed avocado and the cheese. Season with pepper.

3.  Pour the egg-avocado-cheese mixture in the middle of the pan and allow it to spread out into an omelette. Cook on a medium heat till the        top has set, flip and cook for a minute on the second side. DONE! 

Method: (For Scrambled eggs with avocado)

1.   Heat a non-stick pan on medium heat. Drizzle a dab of unsalted butter and swirl it around a little.

2.  While the pan heats, whisk the egg with a fork till light and fluffy. Add the cheese and mix well.

3.  Pour the egg mix into the centre of the melted butter (borrowing Ina Garten’s trick for fluffy scrambled eggs). Lower the heat and gently stir the eggs as they start to set.

4.  Add the mashed/ pureed avocado into the pan jusssst as the egg mix starts to set. Stir gently to evenly distribute the avocado into the eggs. Turn off the heat once cooked. Season with black pepper and DONE! 🙂

Pumpkin & Cheese Couscous

Standard

ImageCouscous, a coarsely ground form of quick cooking pasta made from semolina is a common ingredient used in middle eastern and African cooking. Although it doesn’t have too much flavour on it’s own couscous is pretty yum when combined with a good sauce. Keya took a little while to like the granular texture. Initial episodes of suspiciously eyeing the new texture (when she was about 9 mos) did happen. But I persisted and she finally loves it! Hurrah! Nutritionally – couscous is akin to pasta. It is quick to cook and saves you a LOT of time on crazy days. Also, babies who are just getting teeth, learn to appreciate the granular easy-to-gum texture.

(Although couscous itself cooks in 5 mins, the sauce needs a little time. But I optimize my time by making 3-4 servings at a time and freezing the extra in ice-cube trays. Freezing is so convenient but in general I avoid giving Keya anything that was frozen for more than 2 weeks… thats my personal quirk so I usually use up my frozen baby food within 10 days.)

Keya loves the pumpkin-cheese sauce that I make for her. Its basically a thick version of pumpkin soup with lots of added cheese. I begin by baking the pumpkin because that’s my favourite way of cooking it as you can extract max flavour without losing any nutrients in cooking water as you would by boiling – But feel free to steam it in a veggie steamer  if you own one and/ or are pressed for time.

Nutrition report: This meal is a good source of fiber(from couscous), is rich in vitamins A, B, C, E and beta- carotene. The cheese packs in a lot of flavour and is an excellent source of protein.

ImageIngredients:

– 1-1/2 cups peeled pumpkin cubes

– 4 cloves garlic with peel (if roasting)

OR  1 peeled clove if sauteing in pan

– 1 small onion, sliced thinly

– 5-6 tbsp grated Parmesan cheese

– 1 tsp dried oregano or basil (optional)

– 2 tsp Olive oil

– Salt & Pepper to taste

Method:

1.  Preheat oven to 200 deg C. Line a baking tray with aluminum foil. Toss the pumpkin and unpeeled garlic cloves in a teaspoon of olive oil. Season with salt and pepper. Transfer the pumpkin and garlic onto the baking tray and bake @ 200deg C for 30mins. Cool.

2. Heat the remaining oil in a non-stick pan. Add the sliced onion and saute till soft and slightly golden brown. If you’re steaming the pumpkin instead of baking it with the garlic – add 1 clove of peeled sliced to the pan along with the onion. Allow the contents of the pan to cool.

3.  Place the cooled roasted (or steamed) pumpkin cubes in a blender or food processor along with the roasted(or sauteed) garlic and sauteed onions. Add a little water (about 1/4 cup) and puree everything till nice and smooth.

4.  Return the pureed mixture to the previously used non-stick pan. Add the dried herbs at this point and bring the mix up to a gentle simmer. Stir in the grated Parmesan cheese.

5.  To cook couscous – place 2-3 tbsp of couscous in a bowl (to make a single serving). Pour 1/3rd cup of very hot water (2 times the qty. of couscous) over the couscous and cover with a lid. Set aside for 5 mins allowing the couscous to soften. Uncover and fluff it up using a fork.

6. Serve the couscous mixed with the pumpkin sauce to make a hearty- healthy meal. Sprinkle some extra grated Parmesan on top if you please 🙂

Yummy yum yum!!

11 (3)

Beetroot Cutlets

Standard

IMG_4573Coming up with interesting and fun ways to incorporate vegetables into children’s food is a stumbling block every young parent I know has encountered. Every family has a list of vegetables that is on their regular grocery list – cauliflower, beans, broccoli, carrots, okra, cabbage, eggplants and leafy greens are on ours. Then there are the occasional buys – like mushroom, pumpkins and bell peppers. I have a third list that consists of vegetables that I LOVE but know only so many ways to cook – like bitter gourds and beets. Growing up the only way I remember eating beets was boiled. More recently I started to enjoy Beetroot+ Apple juice when I have the chance. But boiled and juiced beets are not usually on a kids favorite foods list. Its more often than not the vegetable most kids show little to no enthusiasm for. Yet  beets are of exceptional nutritional value; and I was therefore keen to weave them into Keya’s diet. These cutlets are a complete hit with little Keya as well as her beet-hating (now beet-loving) dad! 🙂

Nutrition report: Rich in iron,vitamin C, folic acid ,manganese, potassium & fiber.

photoIngredients:  (makes 6-8 cutlets)

– 1 med. raw beetroot, peeled & finely grated

– 1/2 cup raw oats, coarsely powdered

– 1/4 cup crumbled paneer (optional)

– 2 cloves garlic, peeled & grated

– 1 small onion, very finely chopped

– 1 egg, beaten (optional)

– 1/4 cup dried bread crumbs

– 1-1/2 tbsp dried basil or mint

– salt & pepper, to taste

To make:

1.  Place grated raw beets, oats, paneer, onion, and garlic in a mixing bowl. Add the dried basil or mint leaves and season with salt and pepper.

2. Crack one egg in a seperate bowl. Whisk lightly. Pour the whisked egg into the beet mixture followed by the breadcrumbs. (For vegetarian kids, leave out the egg and add only breadcrumbs. I’ve tried this recipe with and without the egg. Both are just as good.) For recipe with egg, you might need a little more breadcrumbs to help soak up the excess moisture.

3. Once the mixture is well combined, divide it into lemon sized balls. Roll around between your palms to make the ball and pat down gently to flatten into a cutlet.

This recipe freezes very well. I prefer to make up a batch of 6-8 cutlets and freeze these to be used over the next few of weeks. Once you make all the cutlets, you can place them on a non-stick paper and freezer till hard, then transfer the frozen cutlets into a ziplock freezer bag to store in the freezer. Please thaw frozen cutlets to room temperature before cooking. 

4. Heat a little olive or vegetable oil in a non-stick pan. Lightly fry the cutlets on both sides till a nice crusts forms on the outside. Place cooked cutlets on a paper napkin till they’re cool enough to feed your child. Cut up into age-appropriate sizes before offering to your child.

These are outstandingly delicious when sandwiched with toasted bread or burger buns and some tomato ketchup 🙂 Great for meal times, snacks and also lunch boxes for older kids (and parents!)

I came up with this recipe when Keya was about 13 months old. But am positive this recipe can be used for babies as young as 11 mos – specially those who have 6-8 teeth and enjoy chewing on their food.

Vanilla & Cherry frozen yoghurt

Standard

8 (4)Fresh fruit with yoghurt is one of K’s favourite breakfast treats. Encouraged by her enthusiastic response and willingness to try out new stuff, I have introduced her to most of the age-appropriate fruit available here in Singapore. Inspired by her (and my) love for cherries with yoghurt, I created a super simple frozen dessert that we (mom & dad) enjoyed on a warm saturday afternoon as I am a bit cautious about offering her something too cold as yet. You can most certainly treat older toddlers and pre-schoolers to this healthy yummy dessert on warm sunny afternoons.

Cherries are a great source of Vitamins A &C, Calcium, Potassium, Iron as well as trace amounts of Copper, Zinc and Manganese. Yoghurt as we already know is a great source of Protein. The added the vanilla for some extra flavour and a wee little bit of sugar to make this “dessert” worthy. I used Greek yoghurt to make this as it is creamier than regular yoghurt. But if you don’t wish to buy this, you make some of your own by draining the water out of regular whole milk yoghurt by hanging it in a clean muslin cloth over the sink for a couple of hours.

As I do not own an ice-cream maker, I used a simple trick to achieve an ice-creamy texture without the icicles (from the water in the yoghurt) spoiling the fun. This yoghurt needs about 5-6 hours in the freezer before serving. About halfway through the freezing time – pull out the semi- frozen yoghurt and blend in a food processor to break up the icicles and incorporate some air into it. Pour back into the box and freeze till firm. Scoop into bowls and eat up!

8 (2)Ingredients: (Makes 4-5 servings)

– 2 cups greek yoghurt

– 12-15 fresh cherries, stems removed and pitted

– 2 tsp fine sugar

– 1/2 vanilla pod. seeds scraped (or 1/2 tsp vanilla extract)

8 (1)8 (3)To make:

1. Heat a few tablespoons of water and add the pitted chopped cherries along with the sugar. Simmer till the cherries are soft and the sauce is reduced. Cool the sauce and puree the cherries till its slightly chunky.

2.  Swirl the pureed cherries into the vanilla- yoghurt and mix well. Pour the mixture into a freezable container and freeze for a couple of hours.

3.  Blend the semi- frozen yoghurt in a food processor to break up the icicles and pop it back into the freezer till it hardens.

4.  Scoop the frozen dessert into a bowl and enjoy immediately! 🙂