Category Archives: One-dish-meals

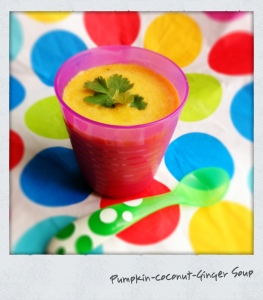
Pumpkin-Coconut & Ginger Soup

Standard

So, we’re already in 2015. Wow. I began writing this blog in July 2013 when my daughter Keya was about 9-1/2 months old. As she grew, so did the nature of the recipes I posted. Having recently realized that my blog has comparatively fewer recipes for parents who have younger children I will now consciously try to post more recipes that the 1 year old and younger can enjoy!
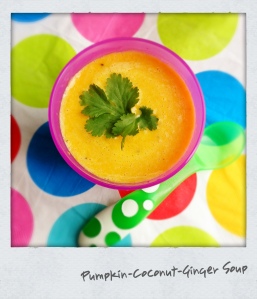
photo 2 (3)This vegan and gluten-free recipe for pumpkin-coconut & ginger soup is a very slightly simplified version of the one I read on a health and wellness website ( http://www.sanaqi.com/pumpkin-coconut-ginger-soup/). The original recipe is perfect, but I simply omitted a few of the ingredients – mainly, coconut oil, as i did not have any. I reduced the proportion of the chick peas that the original recipe calls for as they make the soup rather thick and although healthy, can make little ones a bit gassy. The original recipe calls for roasted pumpkin puree. But I have also tested this out using steamed pureed pumpkin and trust me, it is just as delicious. So don’t stress if you don’t own an oven or simply just don’t want to bother with the roasting. Also, I used lukewarm boiled water to thin out the soup to Keya’s liking ( instead of vegetable broth) as it was one less thing to do 😀

Pumpkin puree is a great choice for a first food for babies and can be introduced around 6-8 mos. Coconut is non-allergenic and very easily digested and in general ok to introduce to babies over 7 mons (based on my research). Chickpeas are safe to introduce to babies who are older than 8months. The ginger in this soup is mainly for its flavour. Go easy on it if you think your little one is too young for it or will not like the taste. It is great for the immune system but not recommended for very young babies. So overall the recipe rating is for 9 months and up. Leave out the ginger and you can feed this to your (older than) 8 month old if she/he is handling pureed mixed veggies nicely and is ready for some fun flavours 🙂

Nutrition report: Pumpkin makes this soup a powerhouse of beta carotene, potassium, protein, and iron . Chickpeas are a great source of fiber and protein. Coconuts are highly nutritious and rich in fibre, vitamins C, E, B1, B3, B5 and B6 and minerals.

Ingredients:

– 1 cup mashed roasted or steamed pumpkin (pumpkin puree)

– 1+1 tbsp olive oil

– 1 clove garlic, sliced

– 1 med. onion, sliced

– 3/4inch knob peeled ginger, sliced into thin rounds

– 3/4cup thick / OR /1-1/2 cups thin coconut milk

– 1/2 to 3/4cup pressure-cooked chickpeas (or low sodium canned ones)

– boiled & slighly cooled water, as needed

– salt & pepper, as needed

Do-ahead for pumpkin: If roasting the pumpkin, preheat oven to 180 deg C. Peel and cut half of a small pumpkin into 1″ cubes. Tumble the cubes on to a baking tray lined with aluminum foil. Drizzle a little olive oil and season with a little salt and pepper. Toss well using hands. Bake for abt 25-30mins or till the pumpkin is soft and lightly golden. Cool slightly and mash well using a fork. Should make about 1 cup of mash/ puree. Set aside.

 – OR –

Alternatively – steam or boil the peeled pumpkin cubes in water. Drain, cool and mash well. Reserve the cooking liquid to use for thinning out the soup later.

Do-ahead for chickpeas: Soak 1/2cup of dried chickpeas in warm water for atleast 4-5 hours or overnight. Pressure cook the soaked chickpeas in 2 to 3 cups of fresh water for 6-7 whistles or till soft. Drain and set aside to cool. If using canned chickpeas, select the low sodium variety. Drain the chickpeas into a colander. Rinse well under running water to get rid of all the brine (liquid in which they’re preserved). Set aside for later use.

photo 1 (3)Method for soup:

1. Heat the olive oil in a saucepan or slightly deep frying pan. Add the sliced garlic, onion and ginger and saute till soft. Lower the heat.

2. Pour the coconut milk in followed by the chickpeas. Do not boil, but just let the mixture warm through nicely and then turn off the heat. Allow the pan to cool down a bit.

3. Place half the onion-coconut milk-chick peas mixture in a high speed blender with half of the pumpkin mash. Add a little boiled water (or the cooking liquid from the pumpkin). Puree till nice and smooth. Add the remaining ingredients in batches to get a nice velvety smooth soup.

4. Pour the pureed soup back into your saucepan. Heat through once while occasionally stirring. Adjust the consistency to your liking with some water and season with salt and pepper. (Can avoid the salt altogether for babies under 1)

Feel free to add a little cooked white or brown rice or some cooked couscous if your older baby will appreciate the texture.

This is undoubtedly a recipe the whole family can enjoy. You can also freeze portions of this soup for later when you are pressed for time. Although I try to avoid it, I do need to freeze soups/ pasta sauces for Keya every now and then. My personal level of comfort is to try and use up the frozen portions within 2-3 weeks. If you do freeze the soup, thaw and re-heat it till super hot, preferably on the stove top and then allow it to cool down to the right temperature before feeding your child.
Quinoa & Vegetable Cheela

Standard

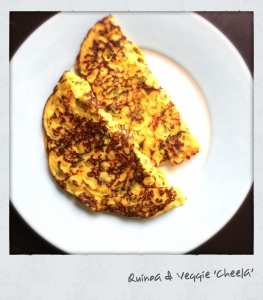
photoCheela” is the Indian version of a savoury pancake. It is extremely versatile in terms of the ingredients that one can use and when made with little or no oil, is a super healthy breakfast, brunch or lunch option for kids and adults alike.

The traditional cheela that my mum makes is primarily made with besan or chick-pea flour, green chillies and spices. It is typically pretty spicy and can be a bit greasy if your not careful with how much oil you add while cooking it. Inspired from a recipe that my friend Preeti shared with me for buckwheat flour cheelas, I tested out the cheela using Quinoa flour as that is what I already had. The results were finger licking good! Keya loves her Quinoa cheela with a bowl of chilled plain yoghurt to go with it!

The range of vegetables that one can add to a cheela helps you flavour them differently, as well as sneak in vegetables that might not be your toddler’s/ child’s favourite but are super good for them.  The ones that I usually mix into the batter are – grated carrot, broccoli or cauliflower, cabbage, very finely chopped french beans and onion. How you combine these is totally upto you. I usually add a little olive oil or ghee to the batter, so I dont really need to add any to ‘fry’ them as they cook. For folks in Singapore, Bob’s Redmill Quinoa flour is available at Mustafa and Cold storage. Also – I add a little chickpea flour to the batter as it helps to keep the cheela from breaking when you flip it during the cooking.

Last week, I finally managed to buy some buckwheat flour (Bob’s red mill brand sold at Cold storage & Mustafa). The recipe works just as perfectly with Buckwheat the only real difference is the colour – the buckwheat cheela is a rich dark brown colour and takes just a wee bit longer to cook that the Quinoa cheela. 

Nutrition report: Quinoa is packed with fiber, calcium, iron and folate and is a fantastic source of vegetarian protein.  Shredded veggies pack in loads of flavor and vitamins. Buckwheat flour is gluten-free. It is a good source of protein, b-complex vitamins and minerals such as copper and magnesium which are important for the production of red blood cells. Much like quinoa, buckwheat is a good source of dietary fiber.

Ingredients (makes 2 to 3, 6″ cheelas):

– 2-1/2 heaped tbsp quinoa flour OR buckwheat flour

– 1/2 tbsp chick-pea flour (besan)

– 1 tsp cumin seeds

– a small pinch of carom seeds (ajwain)

– a small pinch of turmeric powder

– 1 tsp each of grated carrot, grated broccoli, grated cabbage & finely chopped onion,

– few sprigs of coriander, finely chopped

– 1 or 2 tsp of plain yoghurt (optional and can be avoided for a slightly crispier cheela)

– 1 tbsp light olive or vegetable oil

– salt, to taste

– water, as needed to create a thick cake-like batter

photoMethod:

1. In a mixing bowl, combine all the ingredients one by one in the above mentioned sequence, with water at the very end to create what should be a thick, kind of sticky looking batter.

2. Heat a non-stick frying pan or griddle on medium heat. Ladle abt 2-3 tablespoons of the batter onto the hot pan and help it spread out a little bit to form an approx 6″ round (avoid the temptation to spread it out too much, as it might break when you try to flip it over..) Cover the cheela and allow it to cook till the top sets and the first side is nicely browned.

3. Flip to cook the second side till that is browned to your liking as well.

Serve immediately along with a bowl of chilled yoghurt or ketchup. Enjoy!

Pumpkin & Cheese Couscous

Standard

ImageCouscous, a coarsely ground form of quick cooking pasta made from semolina is a common ingredient used in middle eastern and African cooking. Although it doesn’t have too much flavour on it’s own couscous is pretty yum when combined with a good sauce. Keya took a little while to like the granular texture. Initial episodes of suspiciously eyeing the new texture (when she was about 9 mos) did happen. But I persisted and she finally loves it! Hurrah! Nutritionally – couscous is akin to pasta. It is quick to cook and saves you a LOT of time on crazy days. Also, babies who are just getting teeth, learn to appreciate the granular easy-to-gum texture.

(Although couscous itself cooks in 5 mins, the sauce needs a little time. But I optimize my time by making 3-4 servings at a time and freezing the extra in ice-cube trays. Freezing is so convenient but in general I avoid giving Keya anything that was frozen for more than 2 weeks… thats my personal quirk so I usually use up my frozen baby food within 10 days.)

Keya loves the pumpkin-cheese sauce that I make for her. Its basically a thick version of pumpkin soup with lots of added cheese. I begin by baking the pumpkin because that’s my favourite way of cooking it as you can extract max flavour without losing any nutrients in cooking water as you would by boiling – But feel free to steam it in a veggie steamer  if you own one and/ or are pressed for time.

Nutrition report: This meal is a good source of fiber(from couscous), is rich in vitamins A, B, C, E and beta- carotene. The cheese packs in a lot of flavour and is an excellent source of protein.

ImageIngredients:

– 1-1/2 cups peeled pumpkin cubes

– 4 cloves garlic with peel (if roasting)

OR  1 peeled clove if sauteing in pan

– 1 small onion, sliced thinly

– 5-6 tbsp grated Parmesan cheese

– 1 tsp dried oregano or basil (optional)

– 2 tsp Olive oil

– Salt & Pepper to taste

Method:

1.  Preheat oven to 200 deg C. Line a baking tray with aluminum foil. Toss the pumpkin and unpeeled garlic cloves in a teaspoon of olive oil. Season with salt and pepper. Transfer the pumpkin and garlic onto the baking tray and bake @ 200deg C for 30mins. Cool.

2. Heat the remaining oil in a non-stick pan. Add the sliced onion and saute till soft and slightly golden brown. If you’re steaming the pumpkin instead of baking it with the garlic – add 1 clove of peeled sliced to the pan along with the onion. Allow the contents of the pan to cool.

3.  Place the cooled roasted (or steamed) pumpkin cubes in a blender or food processor along with the roasted(or sauteed) garlic and sauteed onions. Add a little water (about 1/4 cup) and puree everything till nice and smooth.

4.  Return the pureed mixture to the previously used non-stick pan. Add the dried herbs at this point and bring the mix up to a gentle simmer. Stir in the grated Parmesan cheese.

5.  To cook couscous – place 2-3 tbsp of couscous in a bowl (to make a single serving). Pour 1/3rd cup of very hot water (2 times the qty. of couscous) over the couscous and cover with a lid. Set aside for 5 mins allowing the couscous to soften. Uncover and fluff it up using a fork.

6. Serve the couscous mixed with the pumpkin sauce to make a hearty- healthy meal. Sprinkle some extra grated Parmesan on top if you please 🙂

Yummy yum yum!!

11 (3)